Wednesday, November 30, 2011

DIY Christmas Wreath

This season I'm feeling a bit Crafty.. 
I decided to make my own wreath, will be making my own stockings {will be posting later this week} and other Christmas decor.


Need:
Wreath Base ~ $3.50 {Walmart}
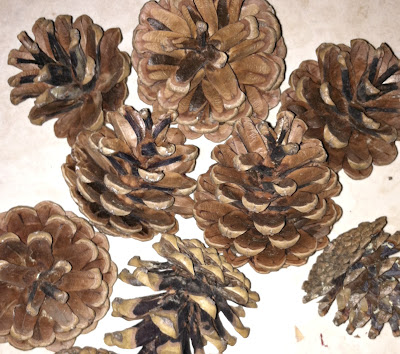
Pine Cones ~ $1.00 each per bag {Dollar store}
Cranberries ~ $1.00 each per bouquet {Dollar Store}
Lace ~ $1.50 at most {Fabric Store}
Hot glue gun ~ $2.00 {Walmart}

I got most of the supplies at the Dollar Store, $1 for a bouquet of cranberries and a $1 for a bag of pine cones which I bought 2 of each { I had some at home also, so you might need 3 of each}
I had Lace at home but you could get some at Joann's, Walmart or any Fabric place.
Wreath base I purchased at Walmart for $3.50.

Get your base ready and turn your hot glue gun ON to heat up

Put some hot glue on each pine cone and stick it randomly any where on the wreath base and hold for about 10 seconds.

After you have placed all the pine cones around the wreath base take your cranberry bouquets and take the cranberry bunch off the stems.
Put some hot glue on the end of the cranberry bunch and stick them in between the pine cones all around the wreath.

Get your lace out {optional}
Tie a bow and cut off the lenght you want to hang and hot glue it to the wreath where ever you want.
I added a little cranberry bunch in the middle of the bow.

I also added a little red birdie on the wreath
Hope this was helpful, it should cost you around $10 in all to make... 
Way better then up to $40 at the store.. and it is fun to make.
Just be careful of the hot glue gun...

Monday, November 21, 2011

Instant Attire

Ever since I got Instagram on my phone.. My camera has been abandoned.. The ease of your phone to snap a pic and post instantly on Instagram / Facebook with fun filters is hard to pass up.

Since all my pictures have been taken via Instagram I kinda slacked off on posting my OOTD on my blog..
So I am now posting some of my outfits taken off Instagram from the past weeks.


If you don't have Instagram on your iPhone yet.. I recommend it.
Warning.. Its Addictive!!

Friday, November 18, 2011

DIY Coasters

How great is Pinterest??
I could spend hours on it and find all sorts of pictures and DIY projects to do, I save, save and save them all for later.
Well I finally decided to try out one of those saved project which were DIY Coasters to give as a welcome gift to a friend/cousin who is now my neighbor.


Need:
4x4 Tiles (Home Depot or Lowe's)
Scrapbook paper
Mod Podge
Sponge Brush
Scissors
Tacky Glue
Adhesive shelf liner or Felt

Get your supplies together

 Trace your tiles on the scrapbook paper for the cut outs
 Cut the scrapbook paper squares out a bit smaller if you want to see the edge of tile

Apply a thin coat of Mod podge with the sponge brush on to your tile then center your scrapbook paper on top and press down to the mod podge. Do each tile one by one. Then put a thin layer of mod podge on top of the scrap paper and tile on each tile and let dry for 15-20 min. Repeat this process 5 or 6 times.

After the tiles have dried completely spray each tile with a clear sealer protector to seal in the mod podge so you can use your coasters sooner then later. Double coat it if you want more protection.

 While the tiles are drying cut out 4x4 shelf liner or felt for the back of each tile.

Put a thin layer of Tacky glue on the back of each tile.

Place the shelf liner on the back of the tile and press down to seal.. 
Let dry for 30 min or more until it is completely dry.

 and TaaDaa you got your self custom made Coasters.

Give it a try.

Wednesday, November 2, 2011

Fav Things 2

This weeks latest favorite things...

 ~ Blood Orange Candle from Urban Outfitters.. Smells Amazing! ~

 ~ Pretty coasters which iv been needing for quite some time now ~

 ~ Delicious smoothie for those times when I'm not to hungry ~

 ~ Broach frame, I just had to have ~

 ~ Fun earrings

 ~ Pretty, pretty glasses ~

 ~ My One Year Bible.. For every day reading ~